
HI, BEAUTIFUL PEOPLE
People often ask me how I take my photos and how I edit them, so I decided to create a guide for y’all. Obviously I am not a pro by any means, but I have been doing this for some time now, and I have picked up a few tricks along the way that I think will be helpful to any of you who may be starting out. I will be showing you all of the apps I use and teaching you how to step up your selfie game. There are tutorials closer to the bottom of this post.
First things first, you do not need fancy or expensive equipment. I do have a camera. I invested in a Canon 80D and a nice Sigma lens a few years ago, but here is a spoiler alert: I rarely use it and thanks to my editing apps, I can get the same great quality photos that I get with my camera when I shoot with my iPhone.
I wish I had known all of this in the beginning of my blogging career because I ended up spending a lot of money on unnecessary things. If you’re just starting out with a blog or photography and you are stressing about the money you think you will have to drop on equipment, stress no more! It is not as important as you may think. People often assume they need the best of the best to create good content. WRONG! You can get amazing content with your phone and a few other little tricks that I will be sharing. I want to note that I am not knocking cameras in any way whatsoever. My point here is that not everyone can afford a big & fancy camera when starting out, and I want you guys to know that it is totally fine because there are other much cheaper options out there!
WHAT YOU NEED TO TAKE YOUR PHOTOS:
- iPhone or camera
- Tripod
- An aesthetically pleasing background
APPS TO DOWNLOAD FOR EDITING YOUR PHOTOS:
- Lightroom
- Facetune (free) // Facetune 2
USING YOUR PHONE OR CAMERA
When shooting my photos with my iPhone, I like to use the square or portrait mode. Square creates the perfect size for Instagram photos without having to crop. Portrait mode automatically uses a large aperture to help keep the background out of focus by using a narrow depth of field so the subject being photographed is the only thing in focus. This option creates selfies that look very professional.
USING A TRIPOD
If you have someone to travel around with you to take your pictures, that would be great. Luckily I scored big. Not only is my husband absolutely incredible at everything he does, he is also an amazing photographer. He travels with me to take my photos and it is so much fun. When I started blogging, he took an interest in photography and learned a lot about it so that he could help me. He always goes the extra mile to make sure he is getting the best photos possible. I am so grateful for that!
If you don’t have someone to take your photos, don’t panic. Tripods are affordable and easy to use. When my husband is working and I need to take photos, a tripod is my backup plan and it always saves the day! It is actually easier to use a tripod when starting out IF you are a little shy. It is easy to get nervous and uncomfortable when someone is staring at you and taking photos of you as you pose. I’m super awkward behind the camera and some days it is just better to be alone. Tripods don’t judge, so you should feel pretty confident when using one!

This is the one that I use. It is adjustable and goes up to 50″. Just set it up, put your camera on timer mode, and get to work! SO SIMPLE! Plus it is only $19.99 which is an unbeatable price. It gets the job done!
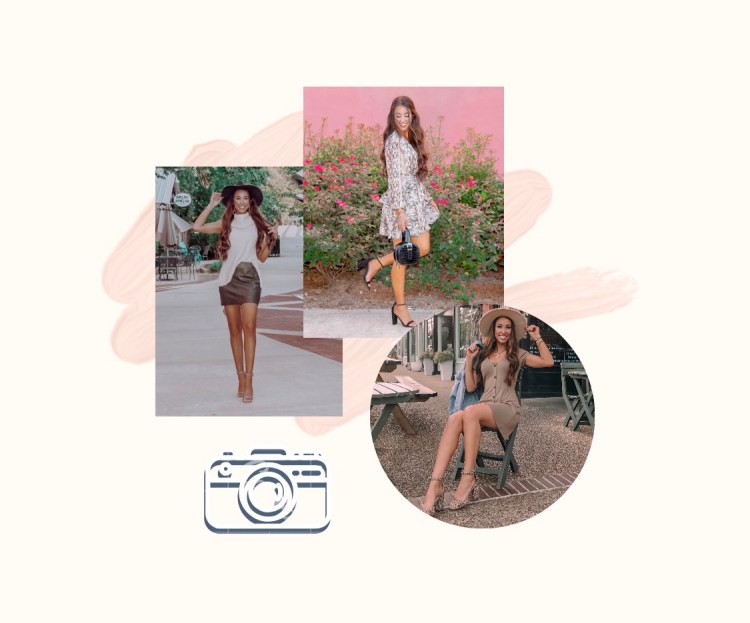
FINDING A BACKGROUND
This can be pretty difficult. The background you choose will depend on the theme you’re going for. I live in a small town, so finding a good background can be challenging for me. I recommend spending some time driving around looking for different places that stand out to you. Write those locations down. Now you will have a list of places to go to shoot when you are ready to. Having your locations picked out prior to your photoshoot saves you a lot of time and frustration, trust me! Some people like a floral scenery, some like grungy backgrounds, some like plain backgrounds, and others like bright or busy backgrounds such as big cities or murals. It is personal preference! To me, there isn’t a right or wrong way. So you just do you, baby. Whatever makes you happy 😉
CHOOSING YOUR LIGHTING // PICKING THE RIGHT TIMING
Lighting is truly the key to getting a great photo. When I started paying attention to lighting, that is when my content starting looking more professional. Lighting is unpredictable so it can be challenging at times. Natural day light is the best of course, but there are other alternatives and I will get to that subject soon.
The time of day that you choose to shoot has a lot to do with the outcome of your photos. I would like to note that I am no professional, so what I am telling you is just what works best for me.
The worst time of day for me: Midday lighting! Midday lighting is primarily comprised of direct, downward sunlight. It is the hardest and most neutrally-colored lighting of any time of day, and is typically the least desirable type of natural light. My skin tone looks harsh and washed out if I shoot in direct sunlight, and my makeup looks WACK, so I try to avoid it!
The best time of day for me: Golden hour! Golden hour is the hour just before sunset and just after sunrise. It is typically regarded as having the most desirable light for photography. This is characterized by horizontal light that casts long shadows and gives subjects a warm glow. This lighting makes my skin and facial features look super soft and glowy. It also makes me look more tan which is a plus (yay)!
Use your best judgement when selecting a time to shoot your photos. If you have to shoot in bad lighting conditions, just remember that you will be able to adjust the lighting when editing your photos. So, if you make a mistake or if your photo is too bright or too dark, it can be corrected! I still have days where I can’t get my lighting right. The struggle is real!
If you can’t do an outdoor photoshoot, you can always invest in studio lights. I have two large umbrella lights and a halo ring light. These take the place of natural lighting and they work great! They are pretty expensive though, so I highly recommend using the free option (daylight) which is the best option anyways. Especially if you are just starting out.

You can check this one out here.

This set is awesome and it is very affordable.
KNOW YOUR ANGLES
Knowing your angles will help you when it comes to choosing your poses. No one wants to photograph their “bad side”. We all have a “better side” for our photos. Different angles look good on different people so you have to play around to find what works best for you.
What I have learned is that the posing with the chin too high looks snobby, and chin too low looks strange. Everyone looks great with the chin slightly down and your head turned about three-quarters to the side.
A face-to-face angle is taken at eye level to your subject, and it is great for portraits. I like this angle for makeup shots.
A high angle is useful for making your subject look smaller. I don’t use this angle much because it isn’t as appealing to me as other angles.
Low angle makes the subject of your photo appear larger. A very slight low angle makes legs appear longer which is one of my photography secrets 😉
A wide angle is great for full body shots. This is a great angle for shooting OOTD photos. Many people use wide angles for fashion photography. This angle also picks up details in the background which can make your photo appear more interesting.
You also can’t go wrong with smiling. Master your best smile because it truly gives your photos a beautiful touch when you show off your pearly whites.
USING LIGHTROOM
Lightroom is a convenient app that offers powerful photo editing features in an easy-to-use interface. It allows you to adjust your full-resolution shots and have both your originals and edits backed up to the cloud. You can organize with searchable keywords that are automatically applied without the hassle of tagging. And you can easily share and showcase your photos in fun ways. This is one of my top favorite apps EVER! I will show you a demo below of me editing a raw photo in the Lightroom app.
USING PRESETS
A preset is a configuration of settings, designed to achieve a certain look or style of your photo. Keep in mind that you have to get Lightroom to be able to use presets. I will show you a few of my favorite preset collections below. You can check out all of the options here.


 You can shop my favorite presets here. I also have a code that you can use for 10% off any of the Classic Collections. Use ‘HOPE10’ at checkout to save $.
Presets will be your new best friend, trust me! They change the selfie game completely. You can add a preset to the dullest photo and it will absolutely bring it to life. When you see those cute Instagram pages with the perfect aesthetic and theme, presets are what they are using to achieve that look. So, definitely invest in presets if you are looking for a way to spice up your selfies. Here are a few before and after photos I did for you to see the difference.


USING FACETUNE
Facetune is a photo editing app used to edit, enhance, and retouch photos. It is one of the easiest editing apps that I have ever used. As you can see in my video below, I mainly use this app to remove unwanted things in my photos, whiten my teeth, smooth my skin, and adjust the colors of my photo only when necessary. There are so many things you can do with facetune, but you shouldn’t get too carried away with it. You want to keep the changes subtle. Going overboard will cause photos to look artificial and they won’t look authentic at all. This app is meant to enhance, but not to completely change your looks.
My last few tips are sooo important.
Get creative, have fun, and be authentic. Being like everyone else is boring and overrated. Don’t be afraid to be bold and to stand out. Good content is created when you’re truly being yourself. Don’t be afraid to test new things and try new poses. Find what works for you and stick to it.
